TurboC2 Setting Header and Include Locations
This weekend I purchased a book from this seller on Craigslist - "Advanced MS-DOS Programming: The Microsoft Guide for Assembly Language and C Programmers" and before opening it, I wanted to get a C environment running.
I found a copy of TurboC2 on Archive.org and tossed that into my DOS Box install. I wrote a "Hello world" and pressed compile and it couldn't include "stdio.h", what the heck?
It seems that the Archive.org copy of Turbo C 2 ships with configuration that sets where the Includes and Lib directories to C:\TC. I keep all my programs in C:\PROGS so of course it can't find any header files for me!
To fix this you can either move your TurboC install to C:\TC, which feels wrong to me, or you could configure it in the options properly.
Steps
- Go to the Directories entry in the Options Menu.
- You can see the default provided configuration directories
- Fill out your appropriate directories for all three of the options.
- Make sure all three are configured properly.
- Then you can save your config, so you only have to do this once.
The Screenshot Way
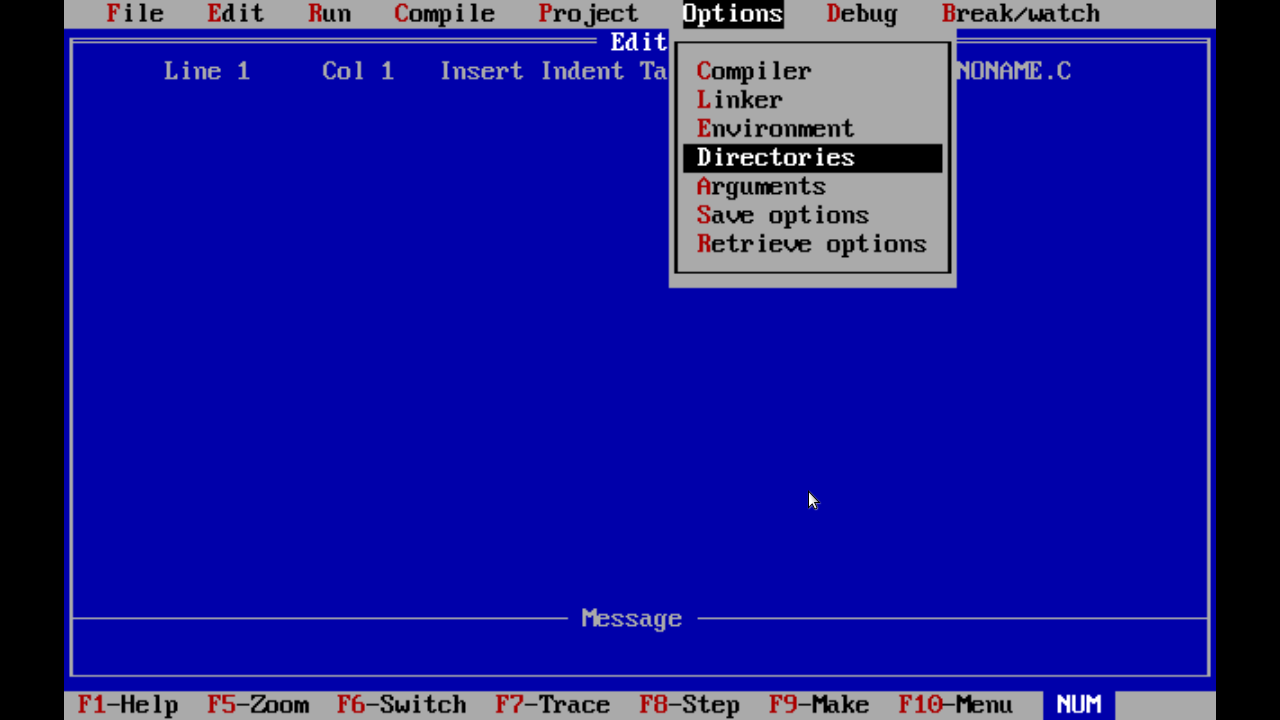
Go to the Directories entry in the Options Menu.
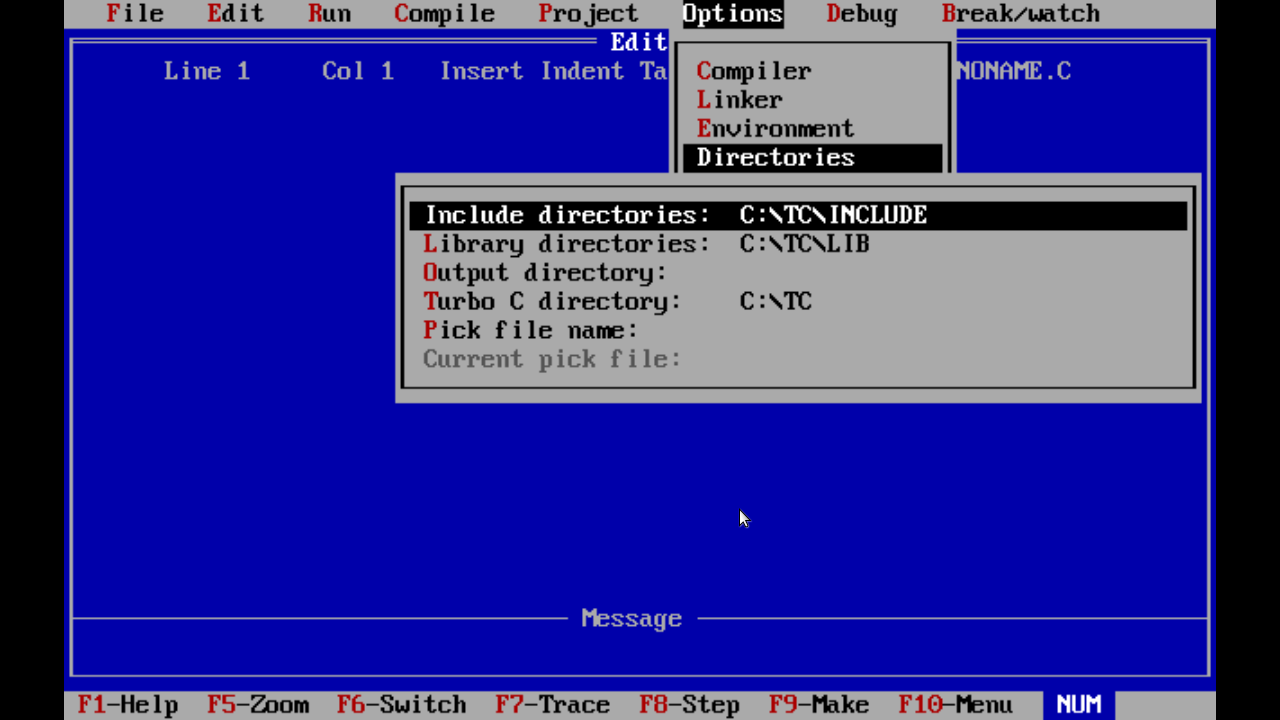
You can see the default provided configuration directories

Fill out your appropriate directories for all three of the options.

Make sure all three are configured properly.
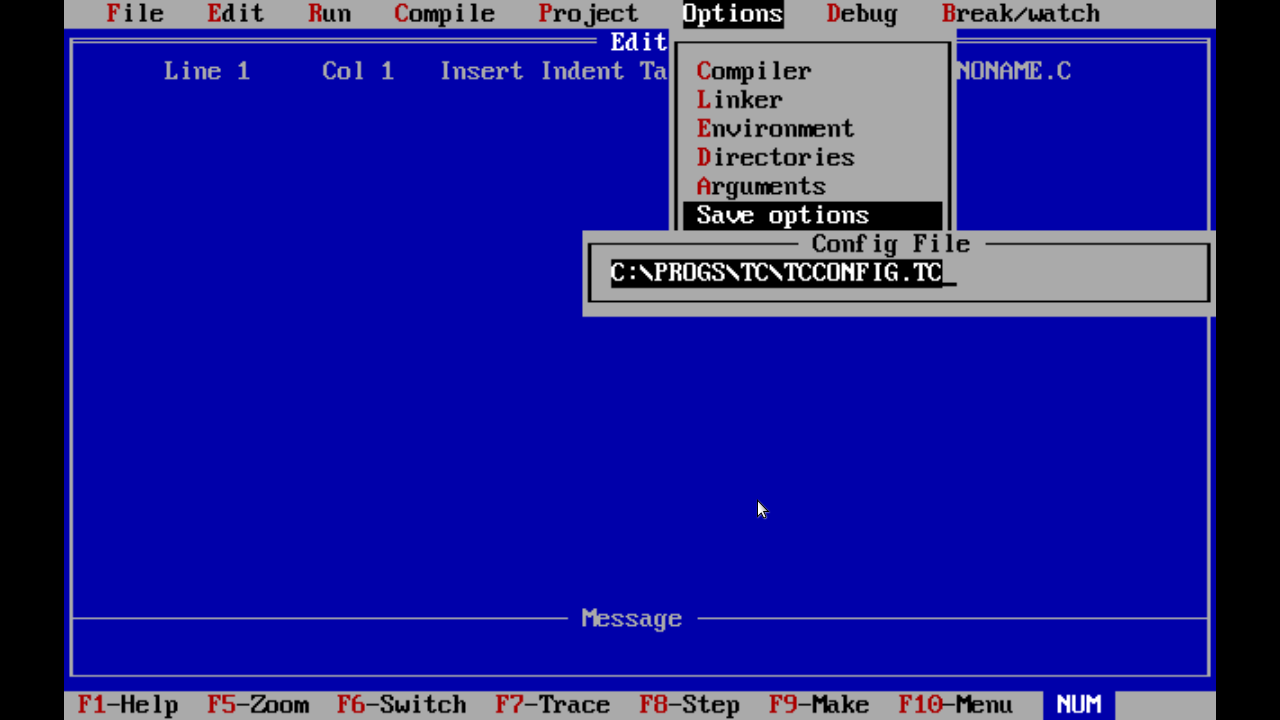
Then you can save your config, so you only have to do this once.
Unfortunately - this file is a binary file. You can't just edit it in a text editor and carry on, so this is the only way I know how to change these locations.
Hopefully this helps anyone else who runs into any include errors with Borland Turbo C 2!